FSCompose
Example: Hello World
In this example we will be going through the development and deployment pipeline of the FSCompose suite. We will run a simple Dockerfile that echos a Hello World on the terminal and fetch the logs it will create. First, we will develop the container locally, independent of the FSCompose suite, to make sure it works as a standalone, and then we will deploy it inside the FSCompose through the whole pipeline.
If you have not already cloned the repo, do so by running the following:
$ git clone git@github.com:DPhi-Space/FSCompose.git
$ cd FSCompose/
$ python3 -m venv venv
$ . venv/bin/activate
$ pip install -r requirements.txt
First Step: Local Development
Docker overview
As previously mentionned, we want a simple Docker Container that prints out a Hello world on the terminal. This requires no coding or packaging, as it can be directly done directly on the Dockerfile. Below is the Dockerfile we will be using to build the container:
FROM alpine:latest

CMD echo "Hello World"
We use the minimal and lightweight base image Alpine Linux. Then, the CMD echo "Hello World" gets executed when we run the docker run command. Let’s start by building the Docker Image from this Dockerfile:
$ cd examples/hello-world/
$ docker build -f Dockerfile.hello -t hello-world-local .
Here we instruct Docker to build a Docker Image from the Dockerfile.hello with the -f flag, and tag the built Image to the hello-world-local. Don’t forget about the . at the end, as it instructs Docker about the context folder for the build, i.e. where the files for the build will be found.
If everything went well, you should see the following output :
[+] Building 1.7s (7/7) FINISHED                                                                                                                docker-container:fs-builder
 => [internal] load build definition from Dockerfile.hello                                                                                                             0.0s
 => => transferring dockerfile: 85B                                                                                                                                    0.0s
 => [internal] load metadata for docker.io/library/alpine:latest                                                                                                       1.6s
 => [auth] library/alpine:pull token for registry-1.docker.io                                                                                                          0.0s
 => [internal] load .dockerignore                                                                                                                                      0.0s
 => => transferring context: 2B                                                                                                                                        0.0s
 => CACHED [1/1] FROM docker.io/library/alpine:latest@sha256:b89d9c93e9ed3597455c90a0b88a8bbb5cb7188438f70953fede212a0c4394e0                                          0.0s
 => => resolve docker.io/library/alpine:latest@sha256:b89d9c93e9ed3597455c90a0b88a8bbb5cb7188438f70953fede212a0c4394e0                                                 0.0s
 => exporting to docker image format                                                                                                                                   0.0s
 => => exporting layers                                                                                                                                                0.0s
 => => exporting manifest sha256:9dfc576b11eab41be7d58a4a833e049571158eb31334c75c32e74093719e0af5                                                                      0.0s
 => => exporting config sha256:d67a21527f29e47d676e85e9885301e8acd3feb6750f793a69fe19f2d75d755f                                                                        0.0s
 => => sending tarball                                                                                                                                                 0.0s
 => importing to docker
Now we are ready to run the Docker Image. Run the following command on the terminal to start a Docker Container from the built Image:
$ docker run hello-world-test
> Hello World
If everything went well you should see the Hello World output in the terminal.
At this points, we have locally validated that the Docker Container we want to run works. Let’s integrate it in the FSCompose suite and run it inside it.
Second Step: FSCompose Testing
Local FS Setup
First, we need to get a local deployment of the FS running. Start by logging in to the DPhi Space Private Registry, with the credentials provided by e-mail:
$ docker login ops.dphi.space
> Username: [username]
> Password: [password]
This will allow you to pull the pre-built Docker Images necessary to run the FS locally.
providers.json Setup
Now let’s configure our providers.json file for this deployment. As this example needs no hardware, we need to set the devices in the json file to empty. You can use the example configuration below:
{
  "providers": [
    {
      "devices": [],
      "name": "DiamondDogs",
      "payloads": ["Camera"]
    }
  ]
}
⚠️⚠️ If you set the device to a device that does not exist or is not connected, the FSCompose will not be able to execute your Container, as it will try to attach a non existing device to it.
GS Setup
The Ground Segment will be the interfaces users use to communicate with the Flight Software once Clustergate is deployed in Space. Therefore, for development and testing we will be using the same software suite, to validate the development and deployment pipeline.
Head to the GS Dashboard and login with your credentials. Then, go to the Files tab, upload the Dockerfile.hello we created earlier and set it to Uplink by clicking the Uplink button next to the file after uploading it. This should be the result:
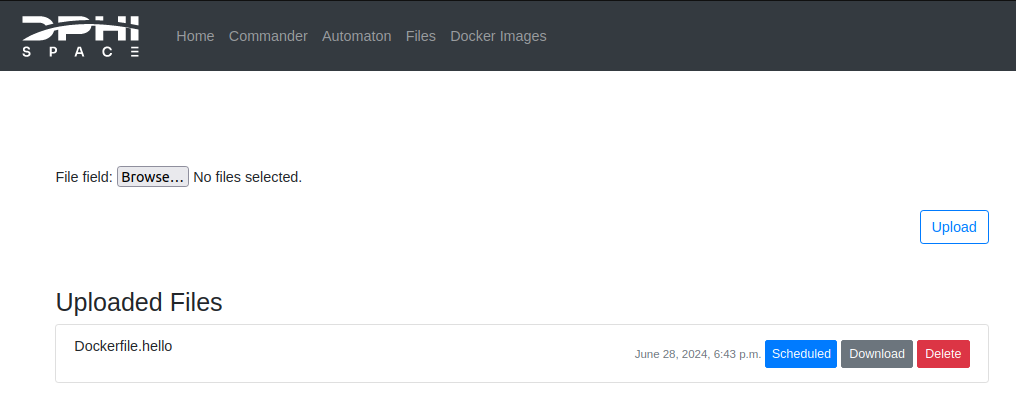
This tells the GS that the file is to be uplinked (i.e. sent to the satellite or to the local deployment of the FS, which are analogous) to the FS on the next communication window. The next step is to write a Command Sequence on the Commander tab to tell the FS when to build the Docker Image and run the Docker Container from this built Image. As the Docker Container exits by itself, we do not need to stop it manually. Below is an example of Command Sequence:
R00:00:00 build_start Dockerfile.hello hello-img hello-container
For a more in detail exaplanation of the commands, check out the Commander section
This should result in the following:

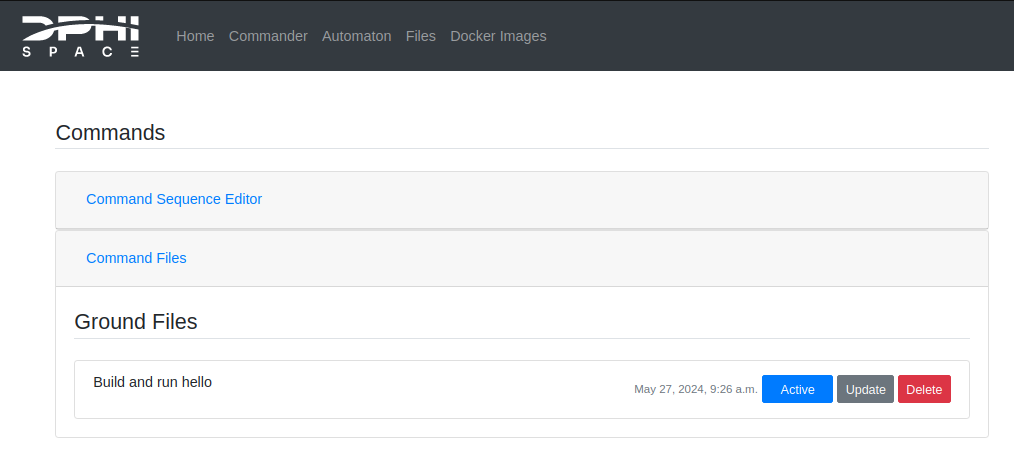
Hit Compile, and activate the Command Sequence in the Command Files list, to tell the GS to prepare this Command Sequence in the next communication window with the FS, by clicking on the Inactive button. The result is shown below:
Now everything is ready to run it on the FS.
FS-GS Interface
Now we are ready to run the FSCompose:
$ cd FSCompose/
$ python3 main.py
Enter your GS credentials so that it correctly interface with your session. Once the local deployment of the FSCompose is ready, you will see the following output:
Connecting to  0.0.0.0 50000
Starting FS Interface
Username: [username]
Password: [password]
Login successful

(...)

Starting fs-interface...

Press e to execute Command Sequence
Press s to send downlink.zip to GS
Press q to quit

Waiting for Instructions
Now everything is ready. Press e to execute the Command Sequence we wrote before for the FS to build and start the Docker Image and Container.
This will take a minute or two. The expected output is shown below:
Waiting for Instructions e
{'Authorization': 'Token 28db0f69442675fc29fea3fcb3b7d44d861d30c7'}
Zip retrieved successfully
FS executing command sequence...Patience.
FS executing command sequence...Patience.
Waiting for downlink files...
Waiting for downlink files...
Waiting for downlink files...
Waiting for downlink files...
Waiting for downlink files...
Waiting for downlink files...
Waiting for downlink files...
Waiting for downlink files...
Waiting for downlink files...
Waiting for downlink files...
Waiting for downlink files...
Waiting for downlink files...
Waiting for downlink files...
Waiting for downlink files...
Waiting for downlink files...
Received File  downlink.zip
Waiting for Instructions
Once we correctly receive the downlink.zip from the FS on the interface script, press s and enter to send it to the GS for processing:
Received File  downlink.zip
Waiting for Instructions s
Sending zip to GS...
Zip sent successfully
Waiting for Instructions
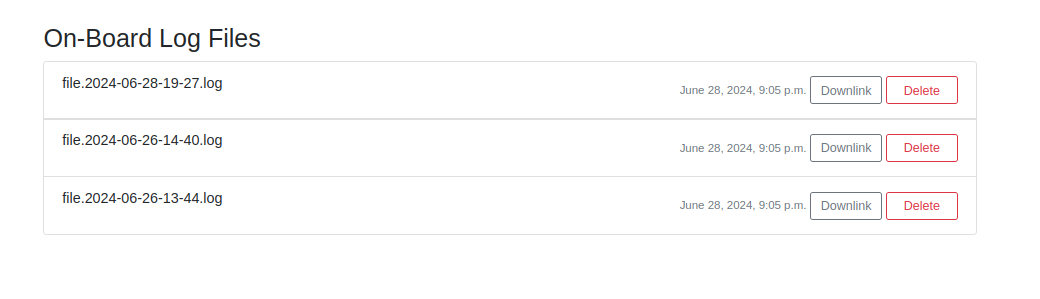
Congratulations! You have successfully run your first Docker Container with the FSCompose. It’s output will be logged into a log file, which generates a text file every minute, which is longer than the whole Command Sequence we executed, which is why the logs generated by this Container will not be visible in the Files On-Board Files section in the GS just yet. However, if we run the experiment again, by executing the same Command Sequence and uplinking the downlink.zip as before, we can see that new files appeared in the On-Board Log Files Section in the Files tab. Whenever a Docker Container is executed in the FS, it’s standard output (i.e., any std::cout in C++ or any print() in Python) will be captured and logged.
This log files are stored in the FS. If we want to analyse them, we need to request the downlink for the next communication window. When running the FS locally, this is equivalent to executing the command sequence in the interface script (i.e. pressing e in the main.py). Let’s go ahead and do that:
Now, when we execute the Command Sequence, the file will be added to the downlink.zip file, which is transferred from the FS to the interface script. Wait for the same output as before:
Received File  downlink.zip
Waiting for Instructions s
Sending zip to GS...
Zip sent successfully
Waiting for Instructions
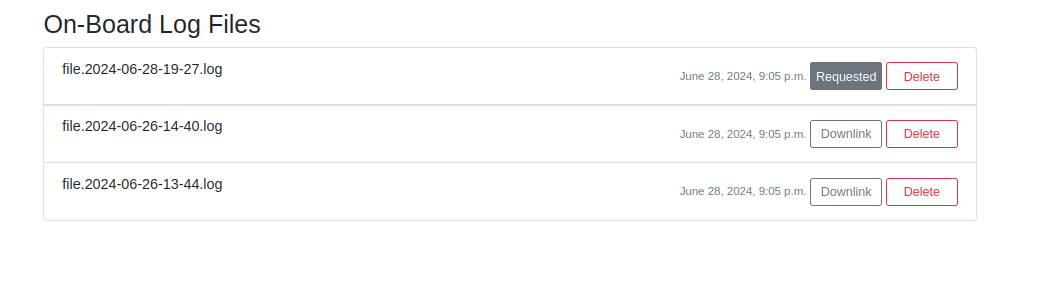
And press s in the main.py to send it to the GS. Now, back in the GS Dashboard, we will see the requested file appear in the Downlinked Files Section of the Files tab:

Which we can directly download and visualize. You should see the following :
2024-06-28T19:27:41+00:00 DiamondDogs/ {"message":"Hello World"}
⚠️⚠️ If you wish do not see any log files, it is possible that Docker was not correctly configured in the setup phase. Double check that the
configure.shscript was correctly executed and try again.
Debug
By running the following comand:
$ ./debug.sh
You can copy from the FS the files in your app/data/ folder, which is where the Dockerfiles and scripts are transferred to, and also the log files of the Docker Images and Containers the FS tries to build and to execute. This can help in case something goes wrong in the execution:
$ ./deploy.sh
Successfully copied 22kB to /home/DiamondDogs/DPhi/FSCompose/debug/

Fetched the following files from FS:
./debug/
├── DiamondDogs
│   ├── Dockerfile.serial
│   ├── log.txt
│   ├── pdb_fun.py
│   ├── serial-test.py
│   └── user.json
├── logs-file-tree.log
├── providers-file-tree.log
├── serial-container.log
├── serial-test.log
├── unzip-logs.log
└── zip-files.log

1 directory, 11 files